Create an alias
1
Go to the Address Book page and click 'Create Alias'
Navigate to the Address Book section in your dashboard (1) and click Create Alias (2).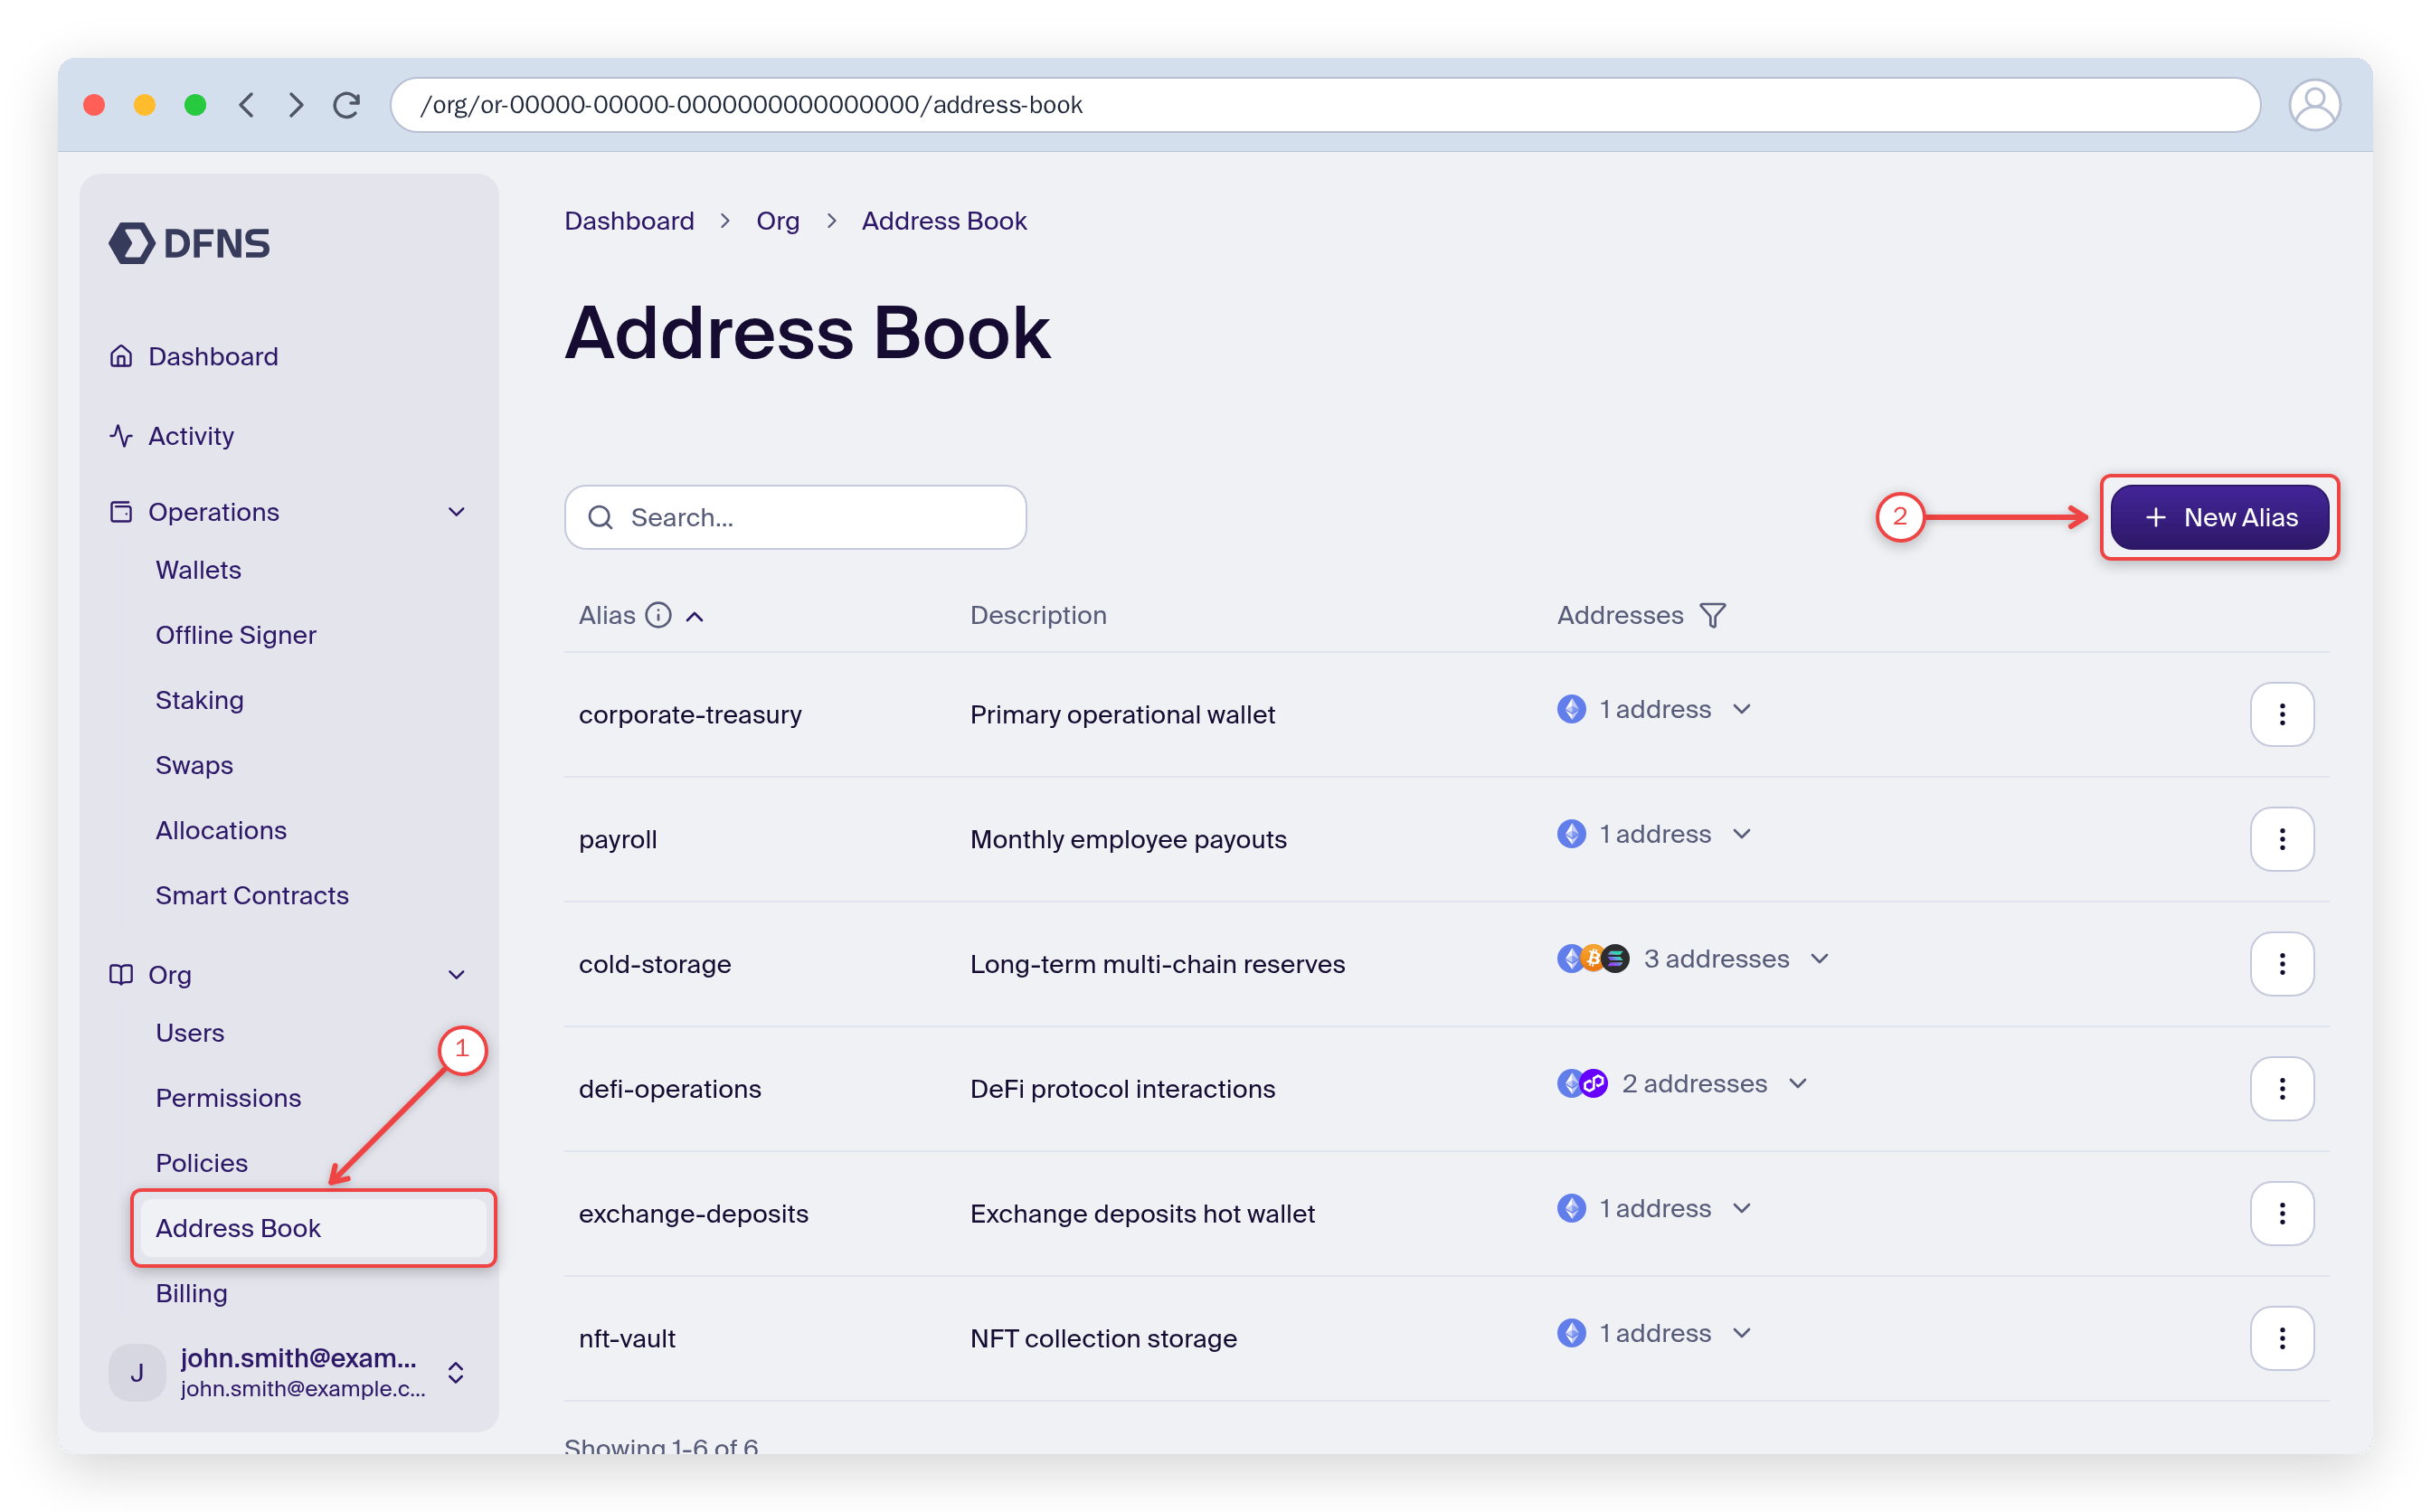
2
Fill in the form and create the alias
The creation form opens. Add a name, an optional description, and a network + address. You can attach multiple networks and addresses to one alias with Add network (1). When you’re done, click Create (2) and 🔑 sign the action with your passkey.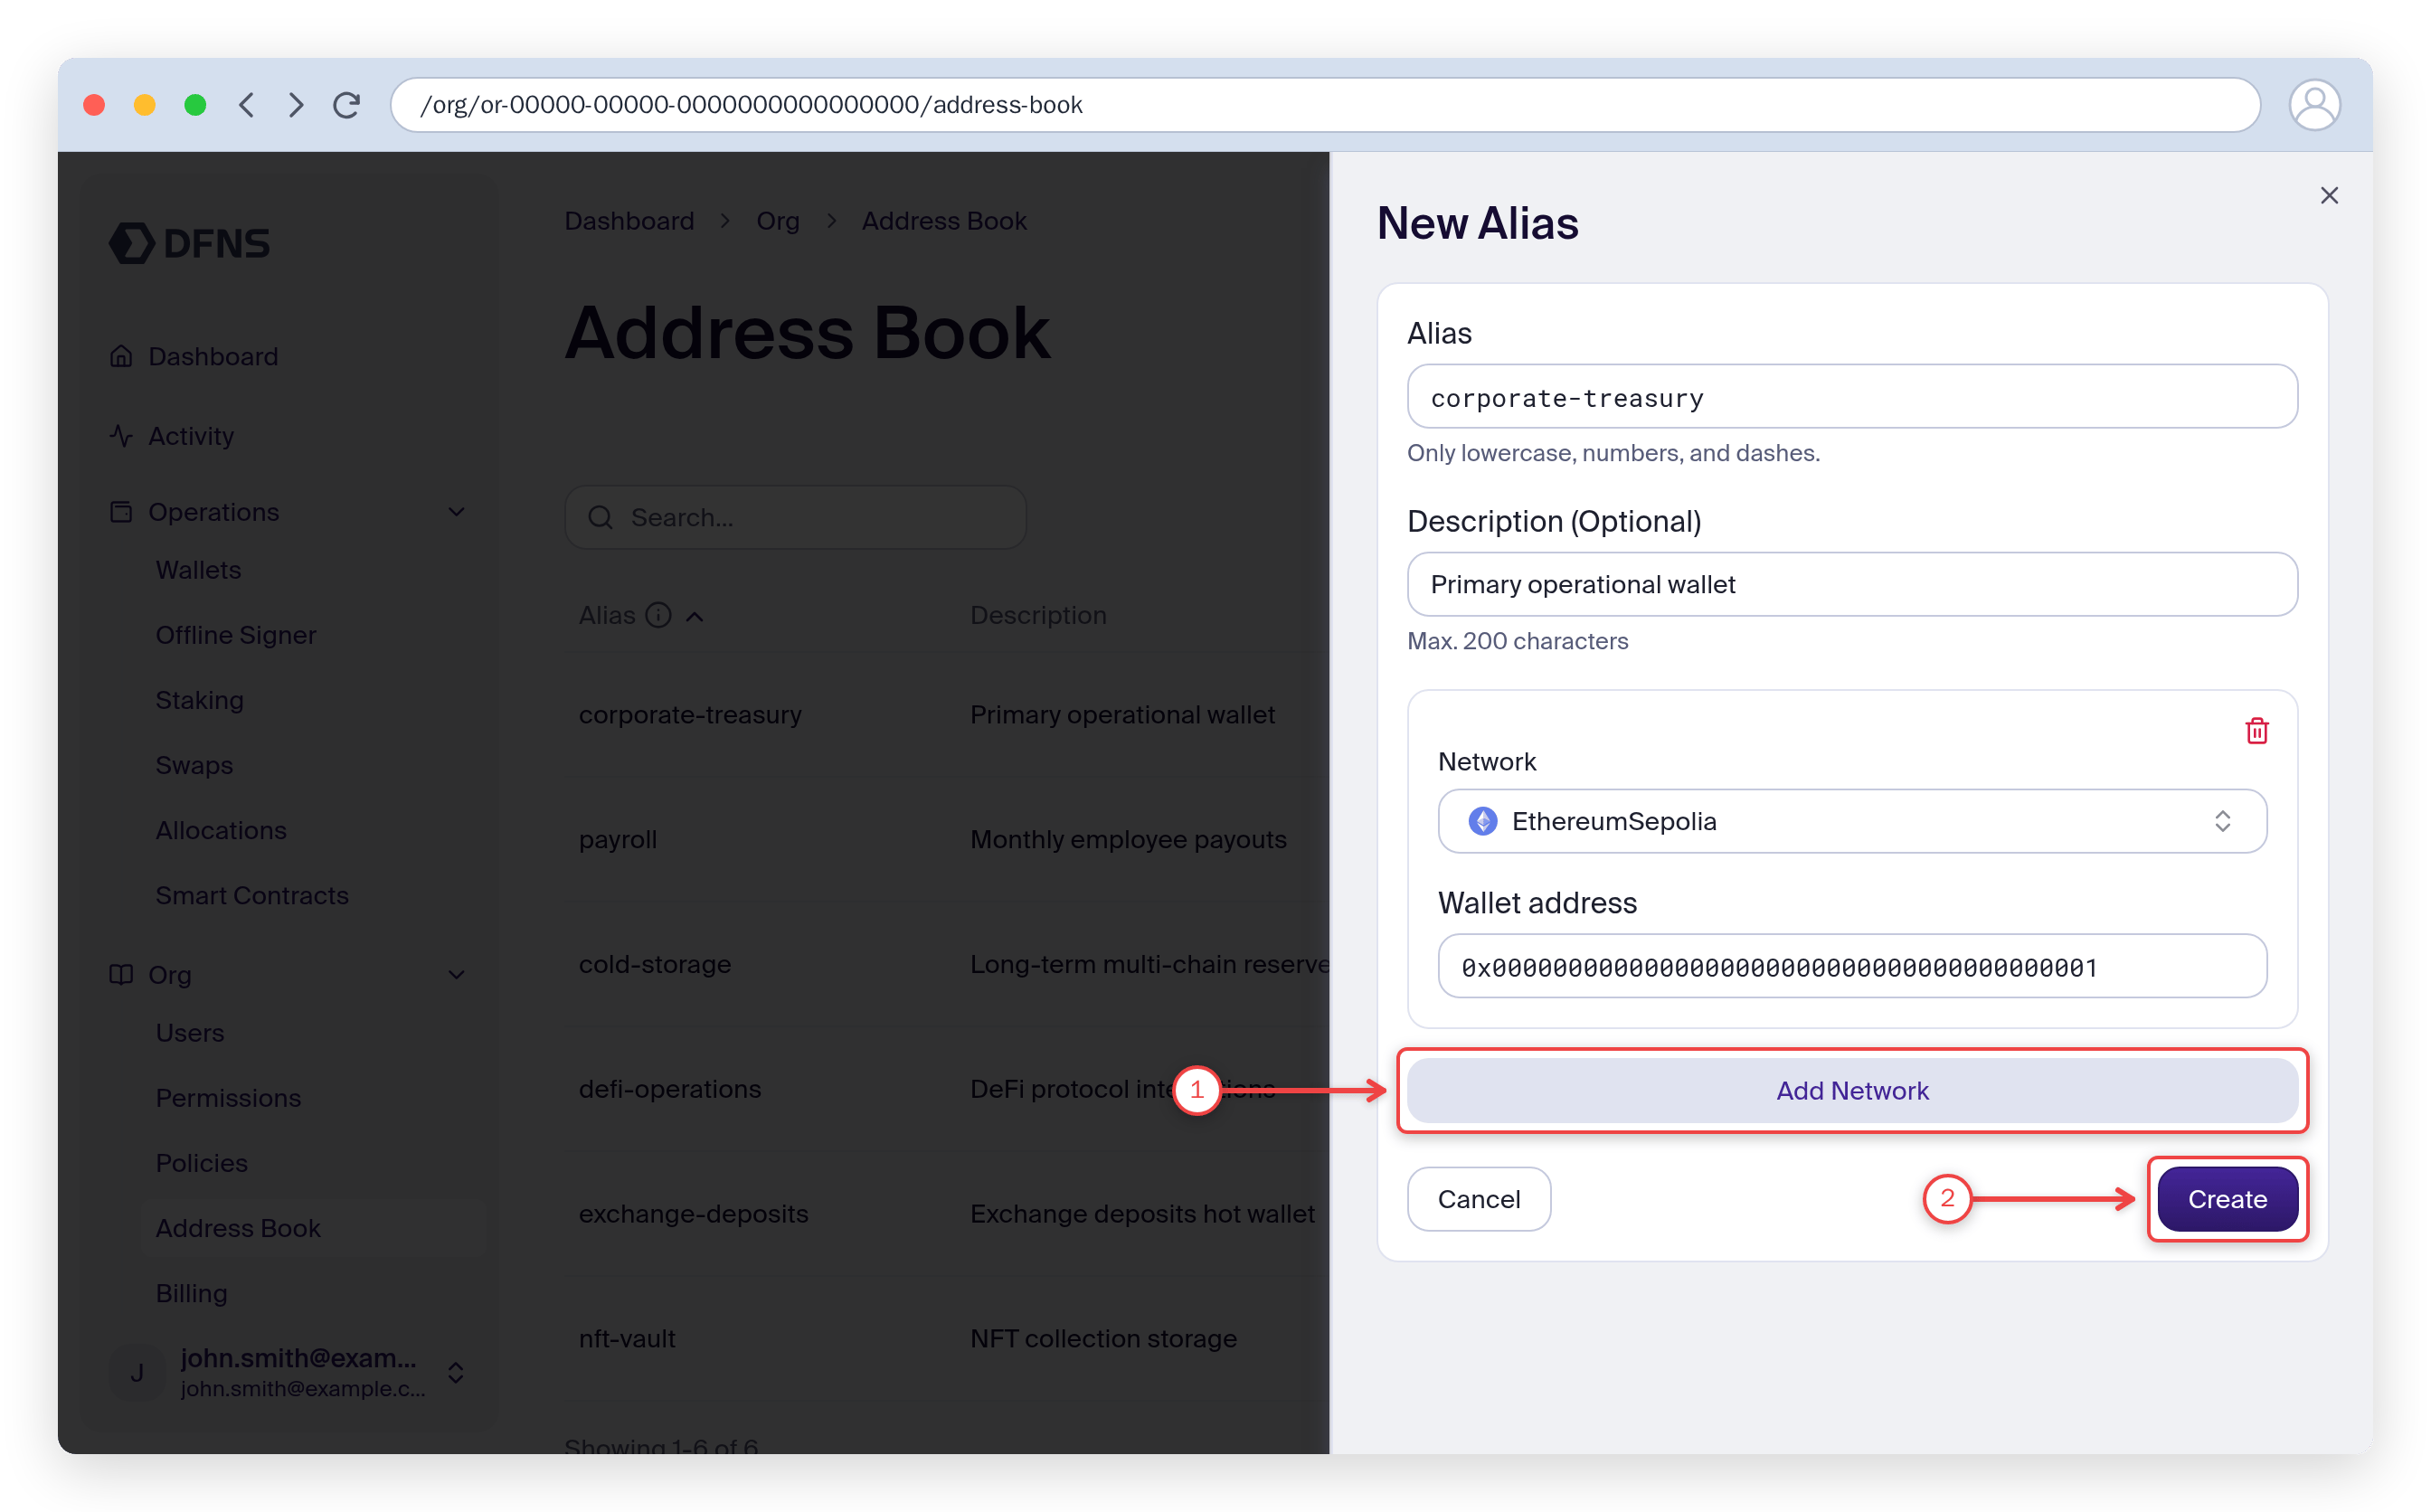
3
Use the alias in a transfer
Your new entry now appears in the Address Book. When you send funds, open the To field in the transfer modal and search the address book to pick a saved alias instead of pasting a raw address.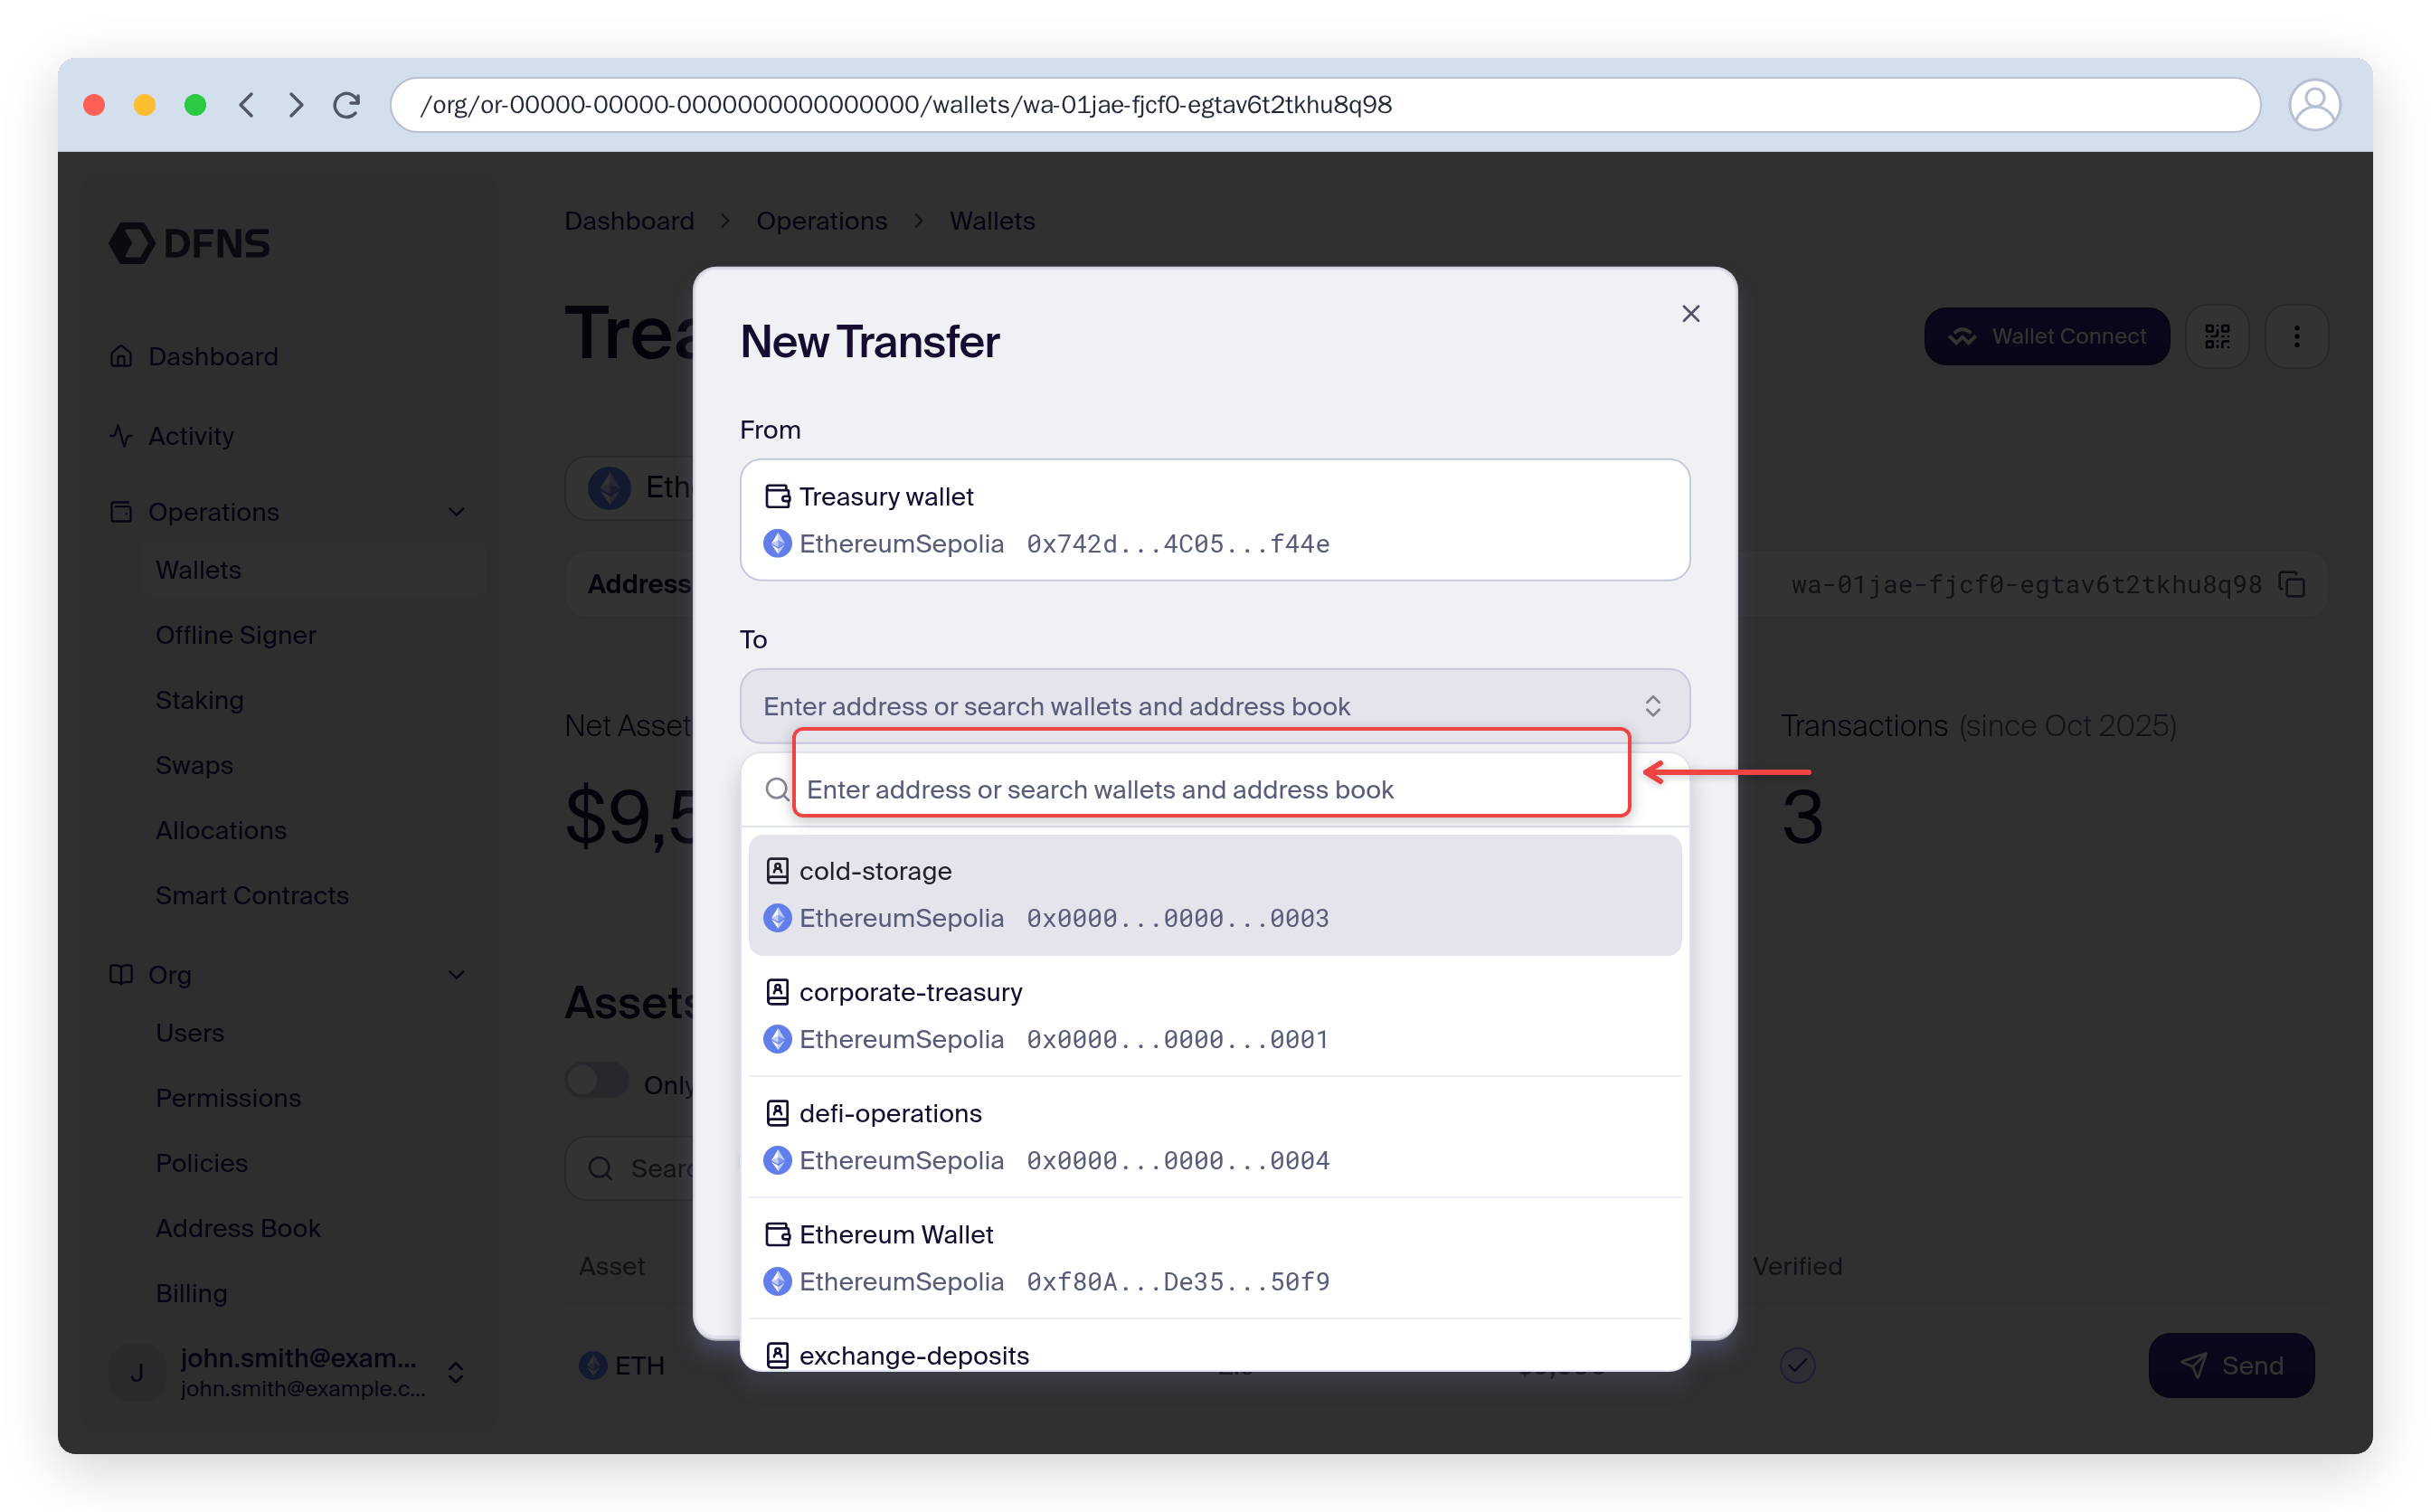
The alias is created. Use it to send funds to a human-readable address.
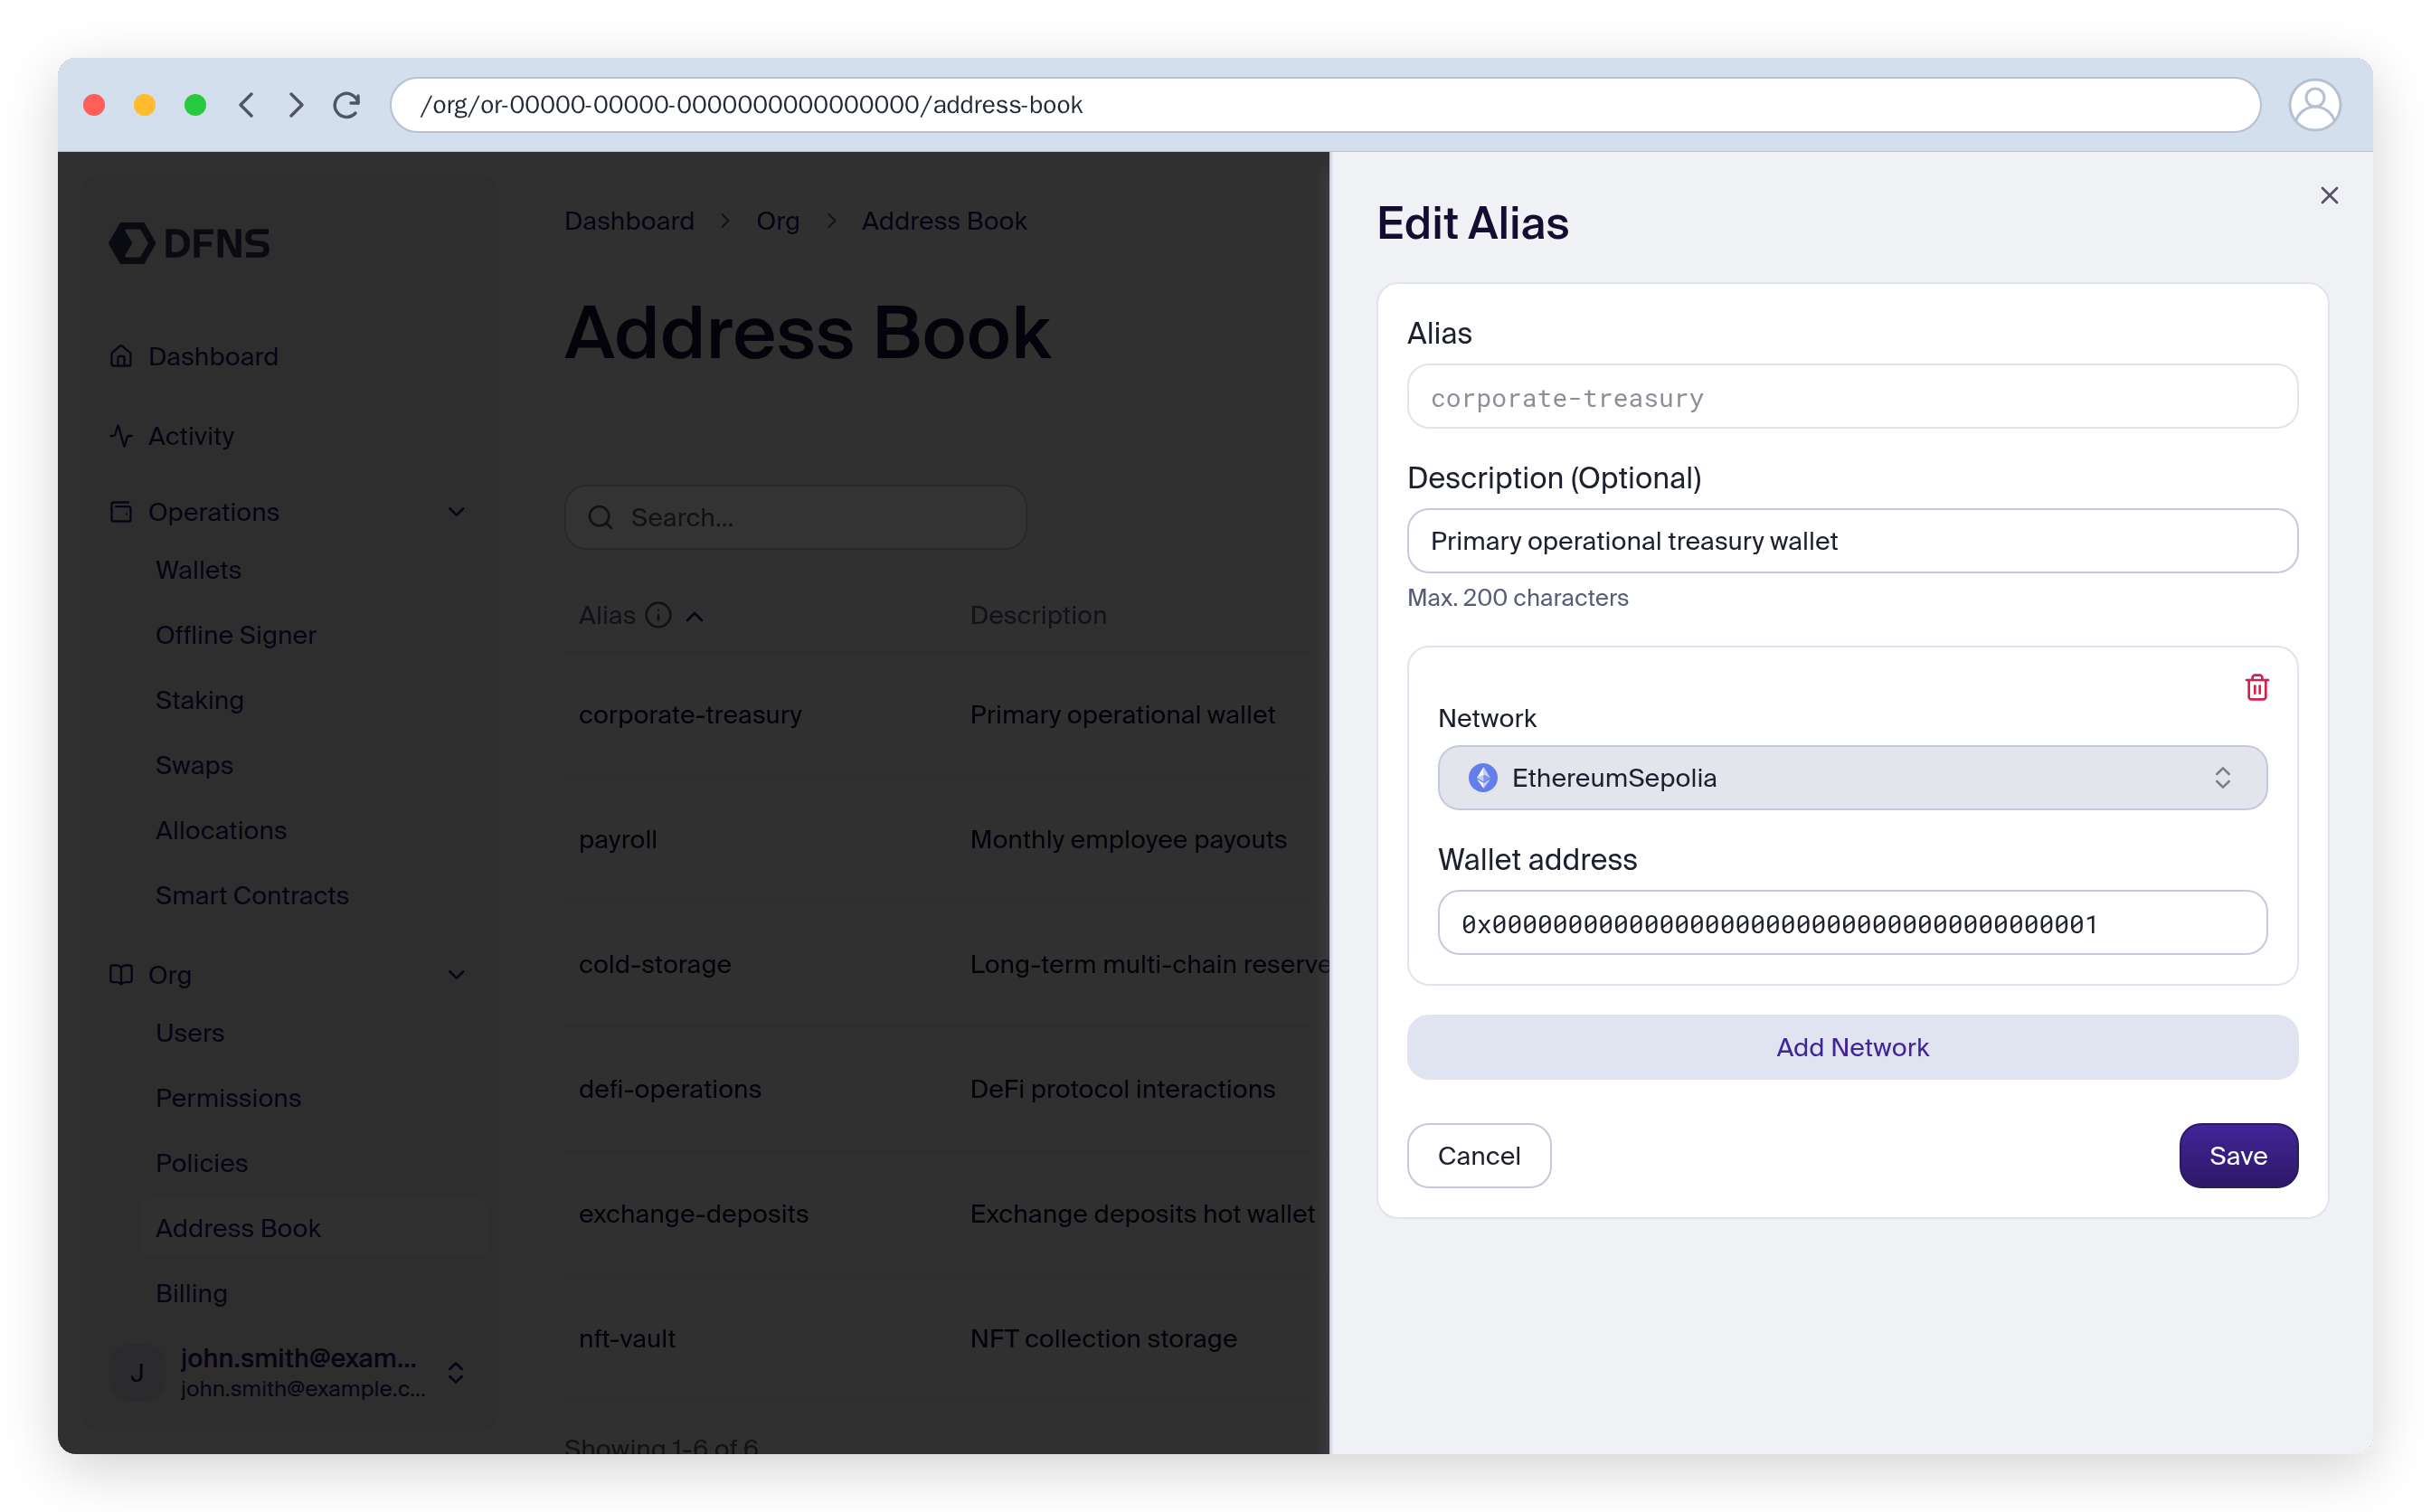
Edit an alias
Each entry in the Address Book has an actions menu. Open it and click Edit to open the Edit Alias form. You can update the description and add, change, or remove the networks and addresses attached to the alias. Review the summary of your changes, then click Save and 🔑 sign the action with your passkey.